

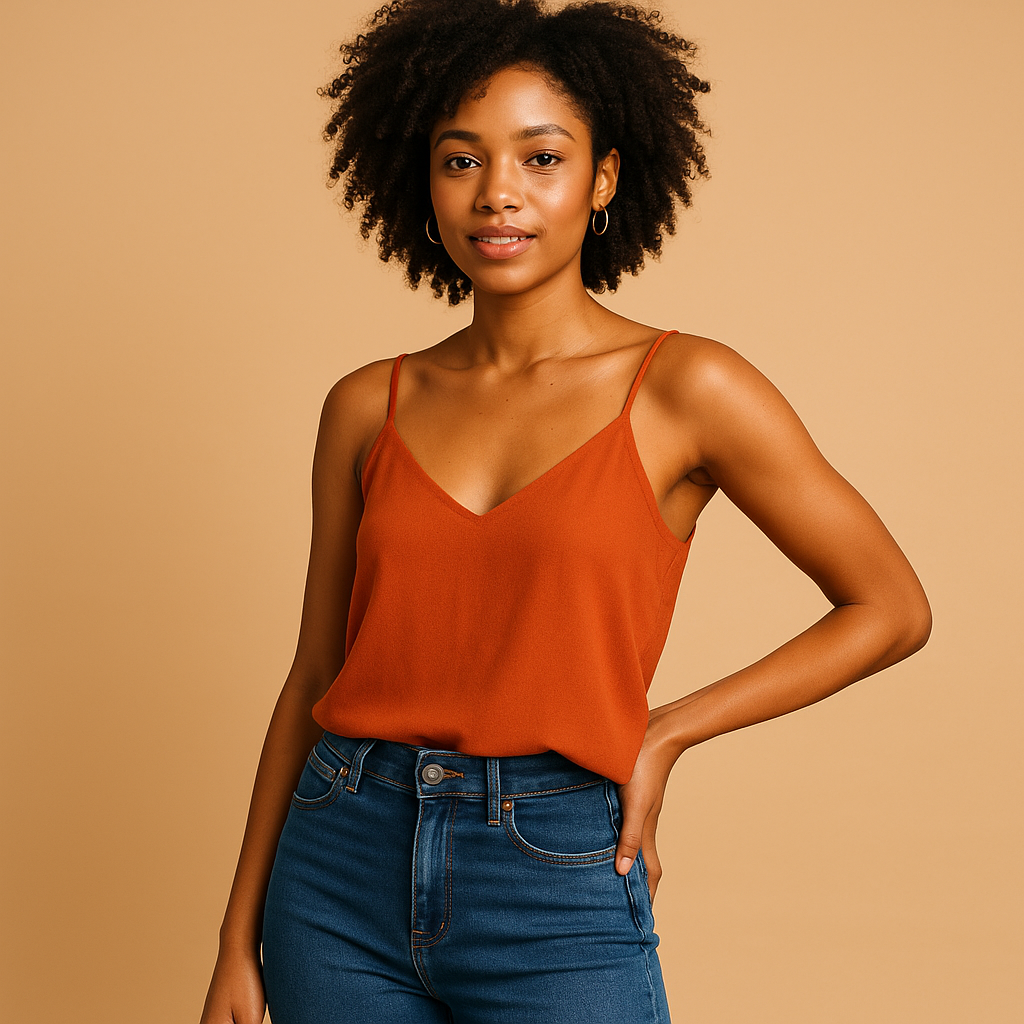
If you run an online clothing store, the single biggest lever you can pull to increase conversions is your product photography for clothing. Shoppers cannot touch, try on, or hold your garments — your images do all of that work for them. Studies consistently show that visual presentation is the number-one factor influencing purchase decisions in fashion e-commerce, ahead of price, reviews, and even brand recognition. Getting your shots right is not a creative luxury; it is a commercial necessity.
Why Product Photography Directly Drives Clothing Sales
Product photography for clothing is not just about aesthetics — it is a measurable revenue driver. According to a 2023 Shopify study, 75% of online shoppers rely on product photos when deciding whether to purchase, making imagery the single most influential element on any product page. When customers cannot physically interact with a garment, every pixel of your photo must compensate for that sensory gap.
Fashion retailers that upgraded their imagery to include multiple angles and on-model shots reported an average 32% reduction in return rates, according to the Baymard Institute. Returns are enormously expensive — they cost the UK fashion industry alone an estimated £7 billion per year (IMRG, 2023). Better photography reduces ambiguity, sets accurate expectations, and cuts costly reverse logistics. If you want to learn how to reduce those costs further, read our complete guide to reducing e-commerce return rates.

The Essential Shot Types Every Clothing Store Needs
Consistency and variety work together, not against each other. Successful clothing retailers on Shopify, WooCommerce, and ASOS use a defined set of image types for every single product listing. Mastering these core formats is the foundation of effective product photography for clothing. Here is exactly what that set should include — and why each format earns its place.
Before you shoot a single image, review our Shopify product page optimisation guide to ensure your photography strategy aligns with your full page layout and SEO structure.
On-Model Photography: The Gold Standard
On-model shots answer the questions customers actually have: How does it drape? Where does the hemline fall? Is the fit relaxed or structured? Research by the Nielsen Norman Group found that users spend 72% more time looking at product images featuring models than those showing clothing on mannequins or hangers alone.
For on-model shots, capture at minimum: a front-facing full-body image, a rear-facing image, and a three-quarter angle. If the item has notable design details — a printed back, a unique collar, statement sleeves — add a targeted detail shot from that angle as well. Showing the garment on two different body types, where budget allows, further reduces purchase hesitation and return rates. This is why on-model photography remains the cornerstone of best-practice product photography for clothing across every major fashion platform.
Ghost Mannequin Photography: Shape Without Distraction
Ghost mannequin shots are especially valuable for structured garments such as jackets, coats, and tailored trousers. They preserve the garment’s silhouette — something flat lays cannot do — without the distraction of a model’s face or body. Many mid-market clothing brands use ghost mannequin as their hero image and supplement it with on-model lifestyle photography for a complete visual story.
Ghost mannequin is also one of the most cost-efficient approaches to professional product photography for clothing when model budgets are limited, since a single shoot can yield dozens of edited, publication-ready images in under 48 hours.
Flat Lay Photography: Cost-Effective and Social-Ready
Flat lay photography — where clothing is arranged on a flat surface and photographed from directly above — has surged in popularity, driven by Instagram and Pinterest visual culture. Flat lays are cost-effective, quick to produce, and highly adaptable for social media content. They work best for casualwear, knitwear, accessories, and outfit-building content where multiple items are shown together to inspire complete looks.

Detail and Close-Up Shots: Justify Every Price Point
Fabric texture, stitching quality, button details, embroidery, and print clarity are all purchase-decision factors that close-up shots address directly. A 2022 survey by Etsy found that listings featuring at least one detail or texture close-up converted 28% better than those without. For premium and luxury clothing specifically, these shots signal craftsmanship and justify higher price points to discerning buyers.
Close-up photography is an often-overlooked dimension of product photography for clothing that pays particular dividends in the £100+ price bracket, where shoppers demand more visual evidence before committing to a purchase.
Lifestyle and Context Photography: Sell the Feeling, Not Just the Fabric
Lifestyle photography places your clothing in real-world or aspirational environments — a model in a linen shirt on a sun-drenched terrace, or a wool overcoat worn walking through a city street in autumn. This type of imagery speaks directly to the customer’s self-image and desired lifestyle, making it a powerful tool for brand storytelling. According to a 2023 Facebook IQ study, lifestyle imagery increases purchase intent by up to 45% compared to standard white-background shots.
Incorporating lifestyle photography into your product photography for clothing strategy allows you to target seasonal campaigns, editorial placements, and social advertising simultaneously, multiplying the return on your shoot investment. For a deeper look at how to build editorial shoots on a budget, see our fashion lifestyle photography budget guide.

Lighting for Clothing Photography: Natural vs. Studio
Lighting is arguably the most technically demanding aspect of product photography for clothing. Poor lighting flattens texture, shifts colour balance, and obscures the details that justify your prices. The two primary approaches — natural light and studio lighting — each have defined strengths and ideal use cases.
Natural Light Photography
North-facing window light on an overcast day produces soft, even illumination ideal for knitwear, linen, and textured cotton pieces. It renders colours accurately without the colour-cast risk of direct sunlight. The major limitation is inconsistency — cloud cover and time of day change your light source constantly, making large-volume shoots difficult to batch. For small boutiques or Etsy sellers producing fewer than 20 SKUs per month, natural light photography is entirely viable and produces beautiful results at minimal cost.
Studio Lighting with Softboxes
For high-volume production, a two-softbox or three-point lighting setup gives you repeatable, controllable results across an entire catalogue. The key advantage of studio product photography for clothing is consistency: every garment is lit identically, making your product grid look cohesive and professional. Industry-standard setups use two 150cm octaboxes positioned at 45-degree angles to the subject, with a white reflector or fill card opposite to soften shadows. Colour temperature should be set to 5500K to approximate daylight and ensure accurate colour rendering across devices.
Platform Image Specifications for Clothing Photography
Shooting great images is only half the job. Platform-specific technical requirements determine whether your product photography for clothing performs optimally in search results, product grids, and mobile previews. Failing to meet these specs leads to compression artefacts, cropping errors, and lower page load scores — all of which damage conversion rates.
- Shopify: Recommended resolution 2048 × 2048 px minimum; 1:1 square ratio for product grids; JPEG at 80% quality for file-size balance; maximum file size 20 MB.
- Amazon: Main image must be on a pure white background (RGB 255,255,255); minimum 1000 px on the longest side for zoom; JPEG preferred; product must fill at least 85% of the image frame.
- ASOS / Zalando: On-model front-facing shot required as hero image; minimum 1200 × 1600 px (portrait 3:4 ratio); consistent plain or branded background.
- Instagram Shopping: Square 1080 × 1080 px or portrait 1080 × 1350 px; RGB colour space; maximum 30 MB; product tagging requires images hosted on a linked Facebook catalogue.
- Etsy: Minimum 2000 px on the shortest side; 4:3 landscape or 1:1 square; listing thumbnail cropped to square so ensure no critical detail is in the extreme edges.
Always export images in sRGB colour space regardless of platform. Adobe RGB files look saturated on professional monitors but appear dull and desaturated on standard consumer screens, which is where your customers are shopping.
Image SEO for Clothing Photography
Every image in your product photography for clothing is an additional SEO asset — or a missed opportunity. Search engines cannot see images; they read the signals you provide. Optimising these signals is straightforward but consistently overlooked by clothing retailers.
File Naming
Name files descriptively before uploading. Use hyphens, not underscores. Example: womens-oversized-linen-blazer-ivory-front.jpg beats IMG_4872.jpg in every measurable way. Include the product name, colour, and angle in every filename.
Alt Text
Alt text is read by search engine crawlers and screen readers. Write descriptive, natural-language alt text that includes your target keyword where it fits organically. Example: “Ivory oversized linen blazer — women’s product photography for clothing showing front view and drape detail.” Keep alt text under 125 characters and avoid keyword stuffing.
Image Compression and WebP Format
Google’s Core Web Vitals — specifically Largest Contentful Paint (LCP) — are directly affected by image file size. Compress all product images using tools such as Squoosh, ShortPixel, or Cloudinary. Serve images in WebP format where browser support allows; WebP files are typically 25–35% smaller than equivalent JPEG files with no perceptible quality loss. For a Shopify store, enabling the built-in image optimisation in your theme settings handles most of this automatically.
Structured data is another critical image SEO lever for product photography for clothing. Adding Product schema markup with the image property populated tells Google exactly which images represent your product, increasing eligibility for rich results and Google Shopping appearances. See our e-commerce schema markup implementation guide for step-by-step instructions.
Equipment Guide: What You Actually Need
The barrier to producing professional product photography for clothing is lower than most store owners believe. You do not need a £5,000 camera to outshoot your competitors — you need the right setup for your volume and budget.
- Camera: A Sony A7 III, Canon EOS R6, or Nikon Z6 II will handle any clothing shoot professionally. For budget-conscious stores, the Canon EOS 250D or Sony a6400 produce excellent results at under £700. Smartphones — specifically the iPhone 15 Pro or Samsung Galaxy S24 Ultra — are genuinely viable for flat lay and detail shots when paired with correct lighting.
- Lens: A 50mm prime lens (or 35mm on APS-C sensors) provides a natural perspective that avoids the distortion a wide-angle creates on garments. For detail shots, a 90–105mm macro lens is ideal.
- Lighting: Two Neewer 150W softbox kits (approximately £120 total) are sufficient for a studio setup. For a mobile natural-light setup, a 5-in-1 collapsible reflector (under £20) is invaluable.
- Tripod: A Manfrotto 290 Xtra or equivalent ensures consistent framing across an entire shoot, particularly important for product grids where alignment inconsistency looks unprofessional.
- Backdrop: A seamless white paper roll (2.7m wide) is the industry standard. For lifestyle and flat lay work, textured surfaces — raw linen, brushed concrete, reclaimed wood — are available as affordable vinyl backdrops.
- Editing Software: Adobe Lightroom Classic for batch colour correction and exposure adjustment; Adobe Photoshop for ghost mannequin compositing and background removal. Capture One is preferred by many fashion photographers for its superior colour rendering and tethering capability.

Common Clothing Photography Mistakes and How to Fix Them
Even experienced sellers make recurring errors that silently suppress conversion rates. Recognising and correcting these issues is one of the fastest wins available in product photography for clothing.
- Inconsistent white balance: When hero images across your product grid have varying colour temperatures, the store looks amateur and untrustworthy. Fix: shoot tethered to a monitor calibrated to D65, or batch-correct in Lightroom using the same white balance preset for every image in a session.
- Under-steamed garments: Creases and wrinkles signal poor quality, even on expensive items. Steam every garment immediately before shooting, and reshoot if creases reappear under hot lights.
- Cropping feet or heads: Full-body on-model images should show the complete outfit including footwear. Cropping feet removes styling context and frustrates customers trying to visualise the complete look.
- Too few images per listing: The industry benchmark for product photography for clothing is 5–8 images per SKU. Fewer than 3 images per listing consistently underperforms against this benchmark in A/B testing conducted by Shopify merchants.
- Ignoring mobile crop: Over 70% of fashion e-commerce traffic is mobile (Statista, 2024). Always preview your images at 375px screen width to check that critical product details are not lost in mobile thumbnail cropping.
How to Build a Product Photography Brief
Whether you are hiring a freelance photographer or briefing an in-house team, a written photography brief is essential for maintaining consistency in your product photography for clothing across seasons, shoots, and photographers. A strong brief includes: shot list per product category, approved props list, background and surface specifications, approved model poses, lighting reference images (“moodboard”), required image dimensions and file formats, and colour correction targets (supplied as a calibrated colour card or LAB values).
Investing two hours in a well-written brief saves dozens of hours in reshoots and post-production corrections. For a downloadable brief template, visit our clothing photography brief template page.
Frequently Asked Questions About Product Photography for Clothing
What is the best background colour for clothing product photography?
Pure white (RGB 255,255,255) is the most universally recommended background for product photography for clothing because it is required by Amazon, preferred by Google Shopping, and keeps visual focus entirely on the garment. Off-white or light grey (around RGB 240,240,240) is a popular alternative that reduces the clinical look of pure white while remaining neutral enough for most platforms. Textured or lifestyle backgrounds work well for secondary images but should not replace a clean-background hero image on most e-commerce platforms. Ultimately, the best background is the one consistent with your brand guidelines and compliant with your primary sales channel’s requirements.
How many photos do I need per clothing product?
The industry-standard recommendation for product photography for clothing is a minimum of 5 images per SKU and an ideal range of 6–8 images. These should include: a front hero shot, a rear shot, a three-quarter angle, at least one detail or close-up shot, and one lifestyle or context image. For products with multiple colourways, each colour should have its own complete image set — sharing images across colours leads to purchase confusion and elevated return rates. Research by the Baymard Institute found that listings with 6 or more images had a 58% higher likelihood of converting than those with 3 or fewer.
Can I use a smartphone for clothing product photography?
Yes — modern flagship smartphones are capable of producing publication-quality product photography for clothing when used correctly. The iPhone 15 Pro, Samsung Galaxy S24 Ultra, and Google Pixel 8 Pro all shoot in RAW format, enabling full post-production control. The critical factors are lighting (a two-softbox setup eliminates the harsh shadows caused by smartphone flash), a tripod mount (to ensure frame consistency), and manual exposure control (use ProRAW on iPhone or Pro mode on Android). Smartphones are particularly well-suited to flat lay photography and detail shots; on-model full-body photography benefits from a DSLR or mirrorless camera due to superior depth-of-field control and autofocus performance on moving subjects.
How do I make clothing photos look professional without a studio?
Professional-looking product photography for clothing is achievable without a dedicated studio space. Use a large north-facing window as your primary light source on overcast days for soft, flattering illumination. Hang a seamless white paper roll or a white bedsheet behind your subject to create a clean background. Press or steam garments thoroughly before shooting. Shoot in RAW format and correct colour balance and exposure in post-production using Adobe Lightroom or free alternatives such as Darktable or RawTherapee. Consistent framing — achieved by marking floor tape positions for your camera tripod and model — makes the resulting images look like a cohesive professional set even when shot in a spare room or garage.
What camera settings should I use for clothing photography?
For studio product photography for clothing using artificial light, set your camera to: ISO 100–200 (lowest native ISO for minimum noise), aperture f/8–f/11 (sufficient depth of field to keep the entire garment sharp), shutter speed 1/125s or lower (flash sync speed), and white balance set to match your flash colour temperature (typically 5500K). For natural light photography, keep ISO as low as possible (100–400), use aperture f/5.6–f/8, and adjust shutter speed for correct exposure — typically 1/60s to 1/250s depending on available light. Always shoot in RAW to preserve maximum editing latitude in post-production.
How much does professional clothing product photography cost?
Professional product photography for clothing costs vary significantly based on scope, location, and photographer experience. In the UK, a freelance product photographer charges between £250–£600 per day for studio work, excluding model fees (£150–£400 per half day for an experienced commercial model). Ghost mannequin and flat lay photography can be more cost-efficient — some studios offer per-SKU pricing of £15–£40 per garment for ghost mannequin shots including retouching. For high-volume fashion brands, a full day’s studio shoot producing 40–60 edited, multi-angle SKUs represents a cost-per-image well under £30 — a fraction of the revenue uplift quality imagery delivers.